A default SSH install is fine on a LAN. Expose it to the internet and within hours your auth log fills up with brute-force attempts from compromised IoT devices and botnets. Most won’t get in — but they’re noisy, they consume resources, and a single weak password somewhere on the system is all it takes.
These eight sshd_config changes close the brute-force vector entirely. None of them is exotic; all of them are in the default /etc/ssh/sshd_config waiting to be uncommented or changed.
Prerequisite: you’ve already enabled SSH (guide) and set up SSH keys (guide). Don’t disable password auth before keys work, or you’ll lock yourself out.
Tested on: Ubuntu Server 22.04 LTS, 24.04 LTS. Settings work identically on Debian, Raspberry Pi OS, and most modern Linux distributions.
Where the file lives
sudo nano /etc/ssh/sshd_config
After every change, restart sshd:
# Ubuntu 22.04 and earlier
sudo systemctl restart ssh

# Ubuntu 24.04 and later
sudo systemctl restart ssh.service
Note: it’s ssh.service (not ssh.socket) when reloading config. The socket is the listener; the service is the actual daemon that reads sshd_config.
Test the new config from a SECOND terminal session before disconnecting your existing one. If you’ve broken something (typo, wrong directive, etc.), you can fix it via the existing session before you lock yourself out.
1. Disable password authentication
The single biggest hardening step. With this off, brute-force attempts fail at the protocol level regardless of the password’s strength.
PasswordAuthentication no
Critical: make sure SSH key auth works for every account that needs SSH access BEFORE you enable this. Once it’s set, you can only log in with a key.
Companion: ChallengeResponseAuthentication no and KbdInteractiveAuthentication no — closes the alternate prompt-based methods.
2. Disable root login
Even if root has a strong key, brute-force scanners always try root first. Disabling it removes the most common username from the attack surface.
PermitRootLogin no
If you absolutely need root SSH for automation, use prohibit-password (allows key-only root login) instead of no:
PermitRootLogin prohibit-password
Better: SSH in as a regular user, then sudo for root tasks.
3. Restrict to specific users
Only the users in this list can SSH in. Everyone else is blocked at the protocol level, regardless of password or key.
AllowUsers your-username
For multiple users:
AllowUsers user1 user2 deploy
Or restrict by group (preferred for larger setups):
AllowGroups ssh-users
Then sudo usermod -aG ssh-users user1 to grant access.
4. Reduce MaxAuthTries
Default is 6. Each session, an attacker gets 6 tries before being disconnected. Drop it to 3 — still enough for typo recovery, half the brute-force throughput.
MaxAuthTries 3
5. Set LoginGraceTime to 30 seconds
Default is 120 seconds — the time SSH allows an unauthenticated session to live before kicking it. Two minutes is generous for an attacker holding the connection open while they brute-force in parallel. Drop it.
LoginGraceTime 30
6. Change the port (optional)
Mild security-by-obscurity. Doesn’t stop a determined attacker (any decent scanner finds non-default ports) but cuts the noise from drive-by scanners hitting port 22 by ~95%.
Port 2222
Pick something memorable but non-standard. Avoid common alternatives like 222, 2222, 22222 — they’re scanned almost as often as 22 these days. A random number above 1024 (and below 65535) is fine.
If you change the port, also:
sudo ufw allow 2222/tcp
sudo ufw delete allow ssh   # remove the old port 22 rule
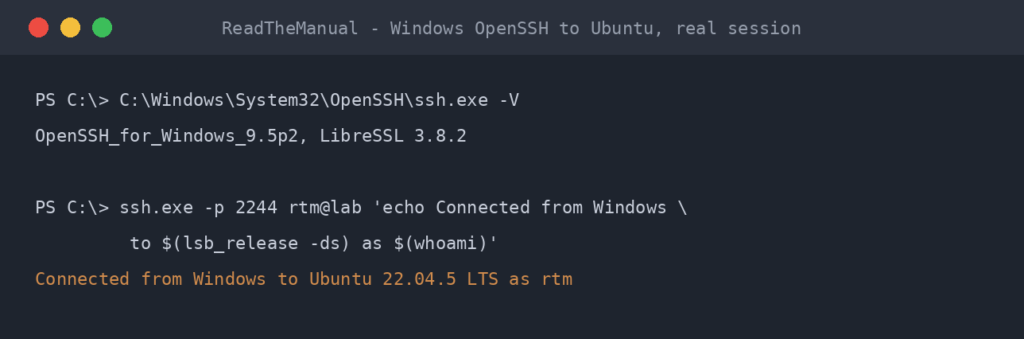
When you connect, specify the port: ssh -p 2222 user@host.
The case against changing the port: it’s not real security, and it adds complexity to every connection. A reasonable take is to leave it on 22 if you’ve done the other hardening properly. Either is defensible.
7. Set idle timeout
Disconnect idle sessions after 5 minutes. Reduces the chance of an unattended terminal being misused.
ClientAliveInterval 300
ClientAliveCountMax 0
ClientAliveInterval 300 sends a keepalive every 5 minutes; ClientAliveCountMax 0 means disconnect immediately if the keepalive isn’t answered. Combined: the session terminates if the client is unresponsive for 5 minutes.
8. Disable port forwarding (if you don’t need it)
SSH supports tunnelling by default. If you’re not using it, turn it off — it’s another attack surface.
AllowTcpForwarding no
AllowAgentForwarding no
GatewayPorts no
If you DO use SSH tunnels (see the SSH Tunneling guide), leave these on.
Optional: 2FA / MFA on SSH
For high-value targets, layer a TOTP code on top of SSH keys. Install libpam-google-authenticator, configure it for your user, and add to sshd_config:
KbdInteractiveAuthentication yes
AuthenticationMethods publickey,keyboard-interactive
Now login requires both your key AND a TOTP code. Overkill for a homelab, mandatory for anything internet-exposed with sensitive data.
Detailed setup: out of scope for this post — search “google authenticator ssh ubuntu” for the canonical guide.
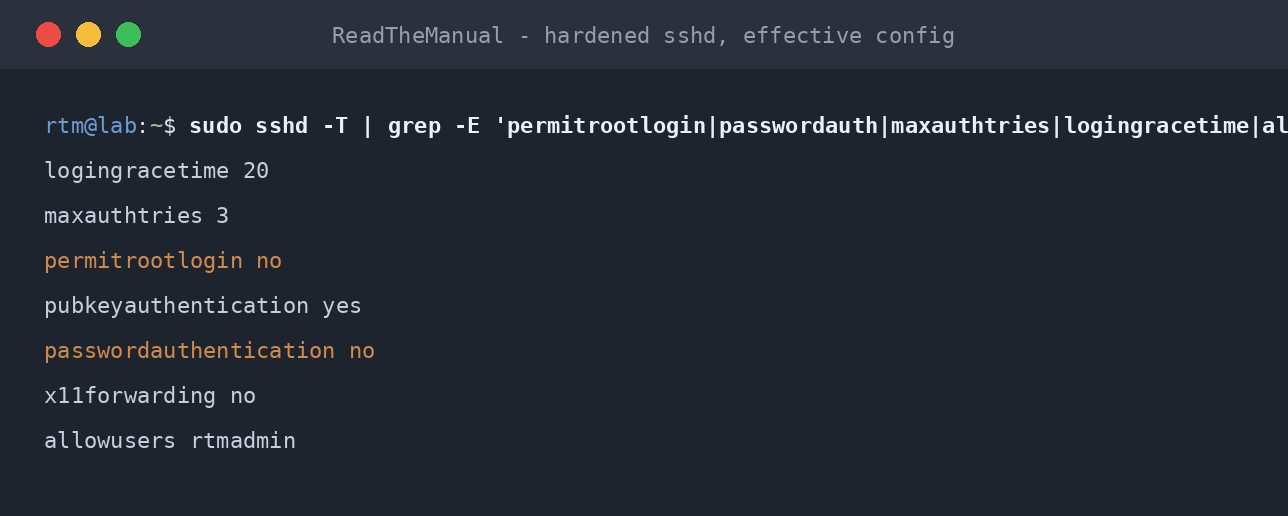
Verify the config before reloading
OpenSSH ships a config tester:
sudo sshd -t
No output means the config is valid. Errors are printed — fix them before reloading.
A complete hardened sshd_config snippet
For reference, the full set of changes from the defaults:
# Authentication
PasswordAuthentication no
ChallengeResponseAuthentication no
KbdInteractiveAuthentication no
PermitRootLogin no
PubkeyAuthentication yes

# Access control
AllowUsers your-username
MaxAuthTries 3
LoginGraceTime 30

# Connection
Port 2222
ClientAliveInterval 300
ClientAliveCountMax 0

# Forwarding (disable if not used)
AllowTcpForwarding no
AllowAgentForwarding no
GatewayPorts no
Restart sshd, test from a second session, you’re done.
What this does NOT cover
Hardening at the OS layer:
- Fail2ban / SSHGuard — ban IPs that fail repeatedly. Even with key-only auth, this cleans up logs. Covered in Fail2ban for SSH on Ubuntu.
- Firewall rules limiting source IPs — if your only SSH client comes from one office IP or one VPN range, drop everything else at the firewall.
- Mesh VPNs (Tailscale, NetBird, WireGuard) — the safest option. Don’t expose SSH to the internet at all; access via VPN only.
Each of those deserves its own post. Linked from this one as they ship.
Frequently asked questions
How do I undo this if I lock myself out?
If you have physical access (or KVM/console access via your hosting provider), boot the server, edit /etc/ssh/sshd_config from the local terminal, restart sshd. Don’t enable hardening if you don’t have a fallback access path.
Why not just put SSH behind a VPN?
Best practice for production. The hardening here is about making SSH-on-the-internet acceptable. SSH-via-VPN is strictly safer and is what I’d recommend for any serious deployment. Tailscale, NetBird, or WireGuard all work.
Will this break automated tools that SSH in?
Possibly. Anything using password auth will break (intentional). Anything using a key but the wrong username (after AllowUsers) will break. Test your automations after each change.
Should I disable SSH protocol 1?
It’s been disabled by default since OpenSSH 7.0 (2015). Modern Ubuntu doesn’t support it. Don’t worry about it.
Your Homelab Is Your Rehearsal Space
Every hardening step on this page maps directly to a CIS Benchmark control for Ubuntu SSH. Disable password auth, restrict users, reduce MaxAuthTries, set idle timeouts. These are not homelab preferences. They are the same settings that auditors check on production servers during compliance reviews.
The difference is that in a homelab you can break things, lock yourself out, and recover with physical access to the machine. In production, that mistake costs an outage. Practise here. Get the muscle memory for testing config changes from a second terminal before disconnecting your active session. That habit alone is worth more than any certification.
Companion guides: Enable SSH on Ubuntu Server, SSH Key Authentication on Ubuntu, Fail2ban for SSH on Ubuntu, SSH Tunneling, Common SSH Errors.
The Complete SSH Series
Getting connected
- Enable SSH on Ubuntu Server
- Enable SSH on Raspberry Pi
- SSH Essentials: Remote Administration
- SSH from Windows to Ubuntu
Authentication and hardening
- SSH Key Authentication
- SSH Server Hardening (you are here)
- Fail2ban for SSH
File transfer and tunnelling
Reference

ReadTheManual is run, written and curated by Eric Lonsdale.
Eric has over 20 years of professional experience in IT infrastructure, cloud architecture, and cybersecurity, but started with PCs long before that.
He built his first machine from parts bought off tables at the local college campus, hoping they worked. He learned on BBC Micros and Atari units in the early 90s, and has built almost every PC he’s used between 1995 and now.
From helpdesk to infrastructure architect, Eric has worked across enterprise datacentres, Azure environments, and security operations. He’s managed teams, trained engineers, and spent two decades solving the problems this site teaches you to solve.
ReadTheManual exists because Eric believes the best way to learn IT is to build things, break things, and actually read the manual. Every guide on this site runs on infrastructure he owns and maintains.
Enjoyed this guide?
New articles on Linux, homelab, cloud, and automation every 2 days. No spam, unsubscribe anytime.