Raspberry Pi OS ships with SSH disabled by default. This is a deliberate security decision (a default-on SSH service with the well-known pi username was a known weak point on early Pi models). Enabling it is straightforward, but the right method depends on whether you have a monitor and keyboard attached, and which Pi OS version you’re on.
This guide covers the three reliable methods, all tested on Pi 4, Pi 5, and Pi Zero 2 W with Pi OS Bookworm.
Tested on: Raspberry Pi 4 Model B (4GB), Raspberry Pi 5 (8GB), Pi Zero 2 W. Pi OS Bookworm (kernel 6.6).

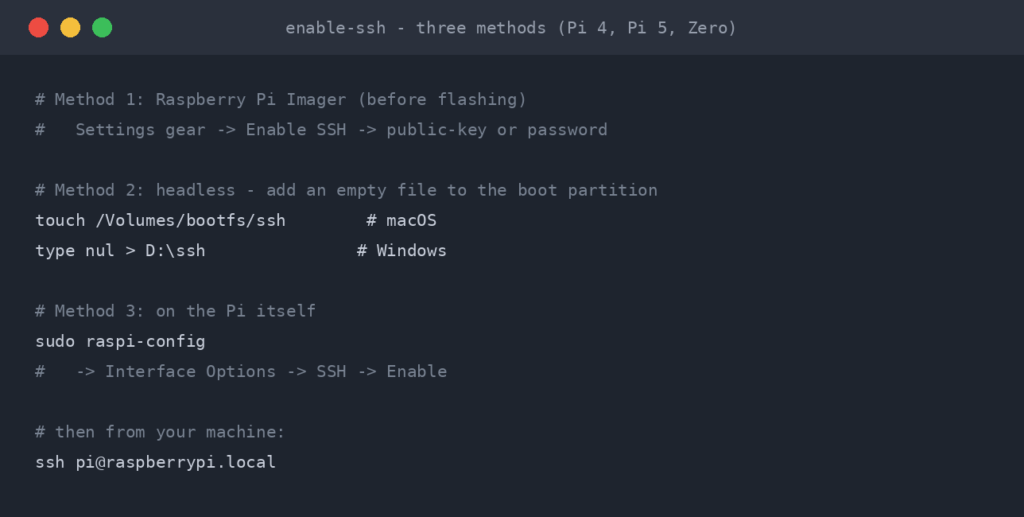
Method 1: raspi-config (when you have a monitor + keyboard)
The official tool for changing Pi configuration.
sudo raspi-config
Navigate using arrow keys:
- Interface Options -> Enter
- SSH -> Enter
- Yes to enable
- OK
- Finish to exit
SSH is now running and starts automatically on every boot.
Verify:
sudo systemctl status ssh
You want Active: active (running).
Method 2: Headless setup via boot partition (no monitor needed)
The classic method for setting up a Pi that will run headless. Works on any computer that can read the SD card.
After you’ve flashed Raspberry Pi OS to the SD card with Raspberry Pi Imager:
- Don’t eject the SD card yet.
- Open the boot partition (or
bootfson newer images) — it should mount automatically and appear as a drive in your file manager. On Linux/macOS terminal:cd /Volumes/bootfs(macOS) orcd /run/media/$USER/bootfs(Linux). - Create an empty file called
ssh(no extension):
– Linux/macOS:touch ssh
– Windows: right-click in the boot partition -> New -> Text Document -> name itssh(delete the.txtextension; show file extensions in Explorer if needed) - Eject the SD card cleanly.
- Insert into the Pi, power on.
On first boot, Pi OS sees the ssh file, enables SSH, and deletes the file (so you don’t enable it accidentally again on every boot).
This is the canonical “I just want to plug it in and SSH in” method.
Method 3: Raspberry Pi Imager pre-config (recommended for new builds)
The newest Raspberry Pi Imager (v1.7.3+) lets you bake SSH credentials into the image before flashing. This is now the easiest path.
- Open Raspberry Pi Imager.
- Choose your OS and target SD card as normal.
- Click the gear icon (settings) before clicking Write.
- In the customisation panel:
– Set hostname (e.g.pi5-server)
– Enable SSH — pick “Use password authentication” or “Allow public-key authentication only”
– Set username and password (or paste your SSH public key)
– Configure WiFi (SSID + password) if going wireless - Save settings, click Write.
When the Pi boots for the first time, it already has SSH enabled, the network configured, and (optionally) your SSH key in ~/.ssh/authorized_keys. You can SSH in straight away.
This eliminates the entire “find the IP, ssh in, run raspi-config” loop. Recommended for anyone setting up multiple Pis.
Default username gotcha
Older Pi OS images shipped with a default user pi and password raspberry. This is no longer the case.
Pi OS Bullseye (April 2022) and later require you to set a username + password during first boot or via the Imager pre-config. There is no pi user unless you explicitly create one.
If a tutorial says ssh [email protected] and your connection is refused with “no such user,” that’s why. Use the username you set during install (or via Imager).
To find your hostname if you forgot:
hostname # run on the Pi to see what it's set to
By default, Pi OS uses raspberrypi.local (mDNS) but if you set a custom hostname in Imager, use that instead.
Connect to your Pi
From any other machine:
ssh [email protected]
# or
ssh [email protected]
Replace username with whatever you set during install. The .local mDNS hostname only works on networks that support mDNS (most home networks do); if it fails, find the IP from your router or by running hostname -I on the Pi via a connected monitor.
First connection prompts for the host key fingerprint — type yes, then enter your password (or use your SSH key if you set one in Imager).
What to do next on a Pi specifically
The same hardening sequence applies as for any Linux server:
- Switch to SSH key auth — the SSH Key Authentication on Ubuntu guide applies identically to Pi OS.
- Disable password auth once keys work — see the SSH Hardening guide.
- Add fail2ban — particularly important for Pis exposed to the internet — see Fail2ban for SSH.
- Consider Tailscale or NetBird instead of port-forwarding — a mesh VPN gets you remote access without exposing port 22 to the open internet at all. Far safer for a Pi at the allotment or family member’s house.
Pi-specific quirks
SSH on Pi Zero / Pi Zero 2 W
Identical mechanics, but the WiFi-only Pi Zero models are slow on busy networks. If SSH feels laggy, check the Pi’s link speed (iwconfig wlan0 shows the link rate — a 24Mbps association suggests weak signal).
SSH on a freshly-imaged Pi 5
Pi 5 boots faster than older Pis, but the first boot still does a lot: cloud-init runs, the filesystem expands to fill the SD card, network comes up. Allow 60-120 seconds before trying SSH on the very first power-on.
Pi OS Lite vs Pi OS with Desktop
Both have identical SSH behaviour. The Lite version skips the desktop environment but openssh-server is in both.
When the SD card has been used before
If you re-flash a card that’s been in another Pi, ~/.ssh/known_hosts on your client will have the old host key cached. You’ll get “Host key verification failed” on first connection. Clear it with:
ssh-keygen -R raspberrypi.local
ssh-keygen -R 192.168.1.100   # or whatever IP the new Pi has
Then reconnect and accept the new fingerprint.
Frequently asked questions
Why is SSH disabled by default on Pi OS?
Historical: early Pi images shipped with pi:raspberry as fixed credentials and SSH on. Anyone scanning home networks could trivially log into thousands of Pis. The Foundation locked SSH off by default to fix this. The user-set credentials and SSH-off-by-default are the remediation.
Can I enable SSH without taking the SD card out?
Yes if you can get a terminal open on the Pi (monitor + keyboard, or via the desktop GUI’s terminal app). Run sudo raspi-config and follow Method 1.
If the Pi is fully headless and you don’t have a console, you have to either pull the SD card and use Method 2, OR re-flash with Imager pre-config.
Does this work on Ubuntu running on a Pi?
The Ubuntu pillar guide applies if you’re running Ubuntu Server for ARM on a Pi instead of Pi OS. Mechanics there match standard Ubuntu (apt install openssh-server, ssh.socket on 24.04, etc). Pi OS uses a different default and the methods on this page.
What’s the default SSH port on Pi OS?
22, same as everywhere. Pi OS doesn’t change defaults for SSH.
My Pi is on a different subnet — how do I find it?
If .local resolution fails, options:
- Check your router’s DHCP client list for the Pi’s MAC address.
- From the Pi (with a monitor temporarily attached), run
hostname -I. - Use
nmapfrom another machine:sudo nmap -sn 192.168.1.0/24lists every device on the subnet.
Do I need to open a port on my router?
Only if you want to SSH into the Pi from outside your home network. For LAN-only access, no. For external access, the safer route is Tailscale or another VPN — not port-forwarding 22 to the public internet.
From Your Pi to the Server Room
That headless Pi running Pi-hole or Home Assistant uses the same SSH access pattern as a jump box in a corporate network. Headless setup, key-based auth, hardening the config, restricting access. The workflow is identical whether you are managing one Pi at home or fifty embedded devices across an office estate.
Hardening SSH on a Pi teaches you the same discipline that CIS benchmarks require on production servers. The difference is that nobody is auditing your Pi, so you get to learn the hard way (locking yourself out, misconfiguring the firewall) in a safe environment. That muscle memory is exactly what employers are paying for when they hire someone who “knows Linux.”
Companion guides: Enable SSH on Ubuntu Server, SSH Key Authentication, SSH Hardening, Fail2ban for SSH. Linked from the relevant sections above as each ships.
The Complete SSH Series
Getting connected
- Enable SSH on Ubuntu Server
- Enable SSH on Raspberry Pi (you are here)
- SSH Essentials: Remote Administration
- SSH from Windows to Ubuntu
Authentication and hardening
File transfer and tunnelling
Reference

ReadTheManual is run, written and curated by Eric Lonsdale.
Eric has over 20 years of professional experience in IT infrastructure, cloud architecture, and cybersecurity, but started with PCs long before that.
He built his first machine from parts bought off tables at the local college campus, hoping they worked. He learned on BBC Micros and Atari units in the early 90s, and has built almost every PC he’s used between 1995 and now.
From helpdesk to infrastructure architect, Eric has worked across enterprise datacentres, Azure environments, and security operations. He’s managed teams, trained engineers, and spent two decades solving the problems this site teaches you to solve.
ReadTheManual exists because Eric believes the best way to learn IT is to build things, break things, and actually read the manual. Every guide on this site runs on infrastructure he owns and maintains.
Enjoyed this guide?
New articles on Linux, homelab, cloud, and automation every 2 days. No spam, unsubscribe anytime.