Most self-hosting guides stop at file storage and media servers. Email is the one service people say you should not self-host.
They are not entirely wrong. Email is harder than Nextcloud or Jellyfin. Deliverability is fiddly. DNS has to be perfect. One misconfigured record and your messages land in spam.
But it is not as hard as the internet makes it sound, and the tools have improved dramatically. Mailcow gives you a complete email stack (SMTP, IMAP, webmail, spam filtering, antivirus, admin panel) in a single Docker Compose deployment.
This guide gets you from zero to a working, multi-domain email server with proper authentication records. We will cover what the other guides skip: the DNS that actually matters, the firewall gotchas, and how to test that your mail actually arrives.
How Do You Self-Host Email with Mailcow? (Short Answer)
Rent a small VPS (2 vCPU, 6GB RAM, roughly £5-12/month) from a provider that allows port 25, point an A record, MX record, SPF, DKIM and DMARC at it, then deploy Mailcow with Docker Compose. Setup takes about an hour. The two things that sink most attempts are a blocked port 25 and missing reverse DNS, so verify both before you start. Everything else in this guide is detail.
What you’ll build:
- Complete email server (send and receive)
- Webmail access (SOGo)
- Admin panel for domains and mailboxes
- SPF, DKIM, and DMARC authentication
- Spam filtering (Rspamd) and antivirus (ClamAV)
- Multi-domain support
What you’ll need:
- 30-60 minutes for initial setup
- Another 30 minutes for DNS and testing
- Basic comfort with the command line (our SSH configuration guide covers getting onto the server securely in the first place)
Before You Start
Choosing Where to Host
Email has specific requirements that make some hosting options better than others.
VPS (Recommended)
A VPS from providers like Hetzner, Contabo, or Linode is the easiest path. You get a static IP, proper reverse DNS, and port 25 is usually available (some providers require you to request it after your first invoice).
- Minimum spec: 2 vCPU and 6 GB RAM plus 1 GB swap, which is mailcow’s documented minimum for the default stack with antivirus, and 20 GB of disk before any mail
- Cost: Around £5-12/month
- Best for: Reliable email that works 24/7
Mini PC or Desktop
If you are running a homelab, you can host Mailcow on any Linux machine with enough RAM. The catch is networking: most residential ISPs block port 25 (SMTP), which means you cannot receive email directly.
- Workaround: Use a VPS as a relay/proxy for inbound mail, or accept that you will only use it on your local network
- Best for: Learning, internal mail, or if you have a business ISP
Raspberry Pi
Technically possible on a Pi 4 with 8GB RAM, but tight. ClamAV (antivirus) alone wants 2-3GB. You can disable it to save resources, but you lose virus scanning on incoming mail.
- Best for: Experimenting, not production email
Port 25: The One That Catches Everyone
SMTP runs on port 25. Without it, other mail servers cannot deliver email to you. This is the most common blocker for self-hosted email.
Check before you commit:
# From your server, test if port 25 is open outbound
telnet gmail-smtp-in.l.google.com 25
If you get a connection, you are good. If it hangs or refuses, your provider blocks port 25. Some VPS providers will unblock it on request once your account has some history; others never will, so check the policy before you pay.
Common provider policies:
- Hetzner Cloud: Ports 25 and 465 blocked by default. Once the account is a month old and the first invoice is paid, you can submit a limit request; Hetzner decides case by case.
- Contabo: Open by default.
- DigitalOcean: SMTP ports 25, 465 and 587 are blocked on Droplets, and DigitalOcean documents no unblock process. Not suitable for a mail server.
- AWS/Azure/GCP: Blocked. Difficult to get unblocked. Not recommended for email.
- Residential ISPs: Almost always blocked. No workaround.
Step 1: Prepare Your Server
You need a clean Linux server with Docker installed, in a full VM (mailcow does not support LXC or OpenVZ containers). Debian 13 or Ubuntu 26.04 LTS are the natural choices today; mailcow’s docs list Debian 11 to 13 and Ubuntu 22.04 and later as fully compatible. If Docker deployments are new territory, our self-hosted deployment guide walks through the fundamentals.
Install Docker
# Install Docker
curl -fsSL https://get.docker.com -o get-docker.sh
sudo sh get-docker.sh
sudo usermod -aG docker $USER
# The script also installs the Docker Compose plugin. Mailcow needs
# Docker 24.0.0 or later and Compose v2, plus git, openssl, curl and jq:
sudo apt-get update
sudo apt-get install -y git openssl curl jq
# Verify
docker --version
docker compose version
Log out and back in for the group change to take effect.
Set Your Hostname
sudo hostnamectl set-hostname mail.yourdomain.comReplace yourdomain.com with your actual domain throughout this guide.
Open Firewall Ports
If you are running a local firewall (UFW, firewalld), open the mail ports:
sudo ufw allow 25/tcp    # SMTP (receive mail from other servers)
sudo ufw allow 80/tcp    # HTTP (Let's Encrypt cert renewal)
sudo ufw allow 443/tcp   # HTTPS (webmail and admin panel)
sudo ufw allow 465/tcp   # SMTPS (secure sending)
sudo ufw allow 587/tcp   # Submission (email client sending)
sudo ufw allow 993/tcp   # IMAPS (email client receiving)
sudo ufw allow 4190/tcp  # ManageSieve (server-side mail filters)
sudo ufw reload
VPS users: check your provider’s cloud firewall too. Many VPS providers have a separate firewall in their web console that sits in front of your server. If your local firewall is open but you still cannot connect, this is almost certainly why. The cloud firewall needs the same ports opened.
This catches a lot of people. Everything looks correct on the server, ufw status shows the ports open, but clients cannot connect because the cloud firewall is silently blocking them.
Step 2: Set Up DNS Records
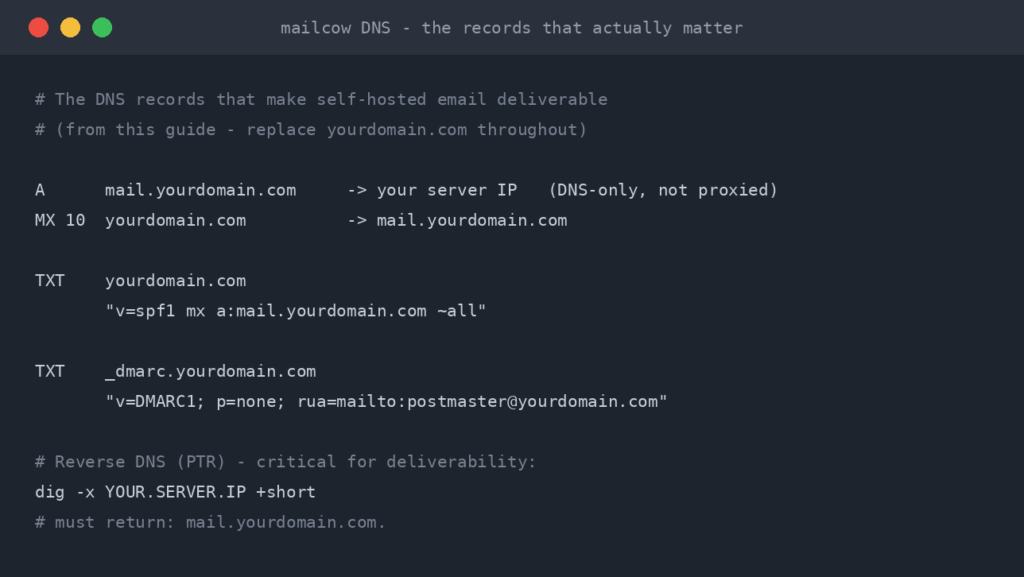
DNS is where most email setups fail. Get this right before installing Mailcow.
You need access to your domain’s DNS management. If you are using Cloudflare, disable the proxy (orange cloud) for the mail subdomain. It must be DNS-only (grey cloud), because Cloudflare’s proxy does not support mail protocols.
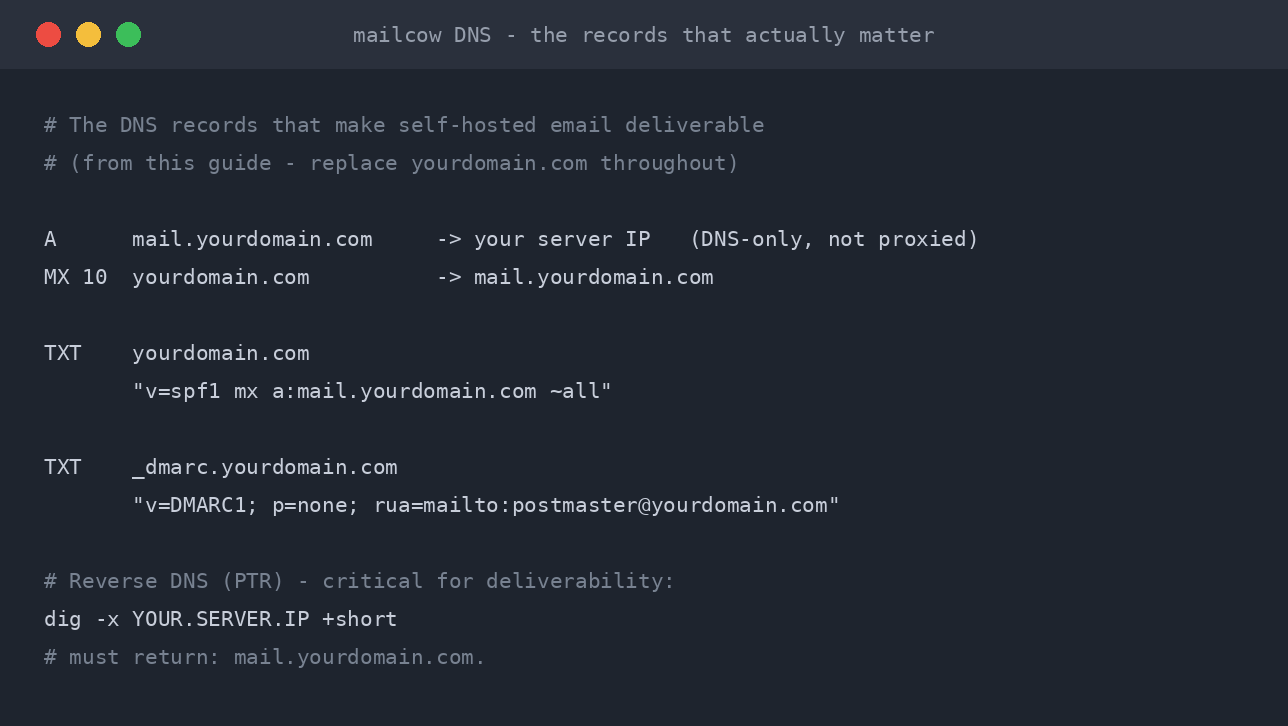
Required Records
Create these records at your DNS provider:
| Type | Name | Value | Priority | Notes |
|---|---|---|---|---|
| A | mail.yourdomain.com |
Your server’s IP | – | Must be DNS-only, not proxied |
| MX | yourdomain.com |
mail.yourdomain.com |
10 | Tells other servers where to deliver mail |
| TXT | yourdomain.com |
v=spf1 mx a:mail.yourdomain.com ~all |
– | Authorises your server to send mail |
| TXT | _dmarc.yourdomain.com |
v=DMARC1; p=none; rua=mailto:[email protected] |
– | Reporting policy for authentication failures |
Reverse DNS (PTR Record)
This is critical for deliverability. Your server’s IP address must resolve back to mail.yourdomain.com.
- VPS: Set this in your provider’s control panel (usually under “Networking” or “Reverse DNS”)
- Homelab: Contact your ISP, though most residential ISPs will not do this
Verify it’s set:
dig -x YOUR.SERVER.IP +short
# Should return: mail.yourdomain.com.
Verify Your DNS
Before proceeding, confirm your records are live:
# Check MX record
dig MX yourdomain.com +short
# Expected: 10 mail.yourdomain.com.

# Check A record
dig A mail.yourdomain.com +short
# Expected: YOUR.SERVER.IP

# Check SPF
dig TXT yourdomain.com +short
# Should include: v=spf1 mx ...
DNS can take up to 48 hours to propagate, but usually it is minutes with Cloudflare.
Step 3: Install Mailcow
# Clone the repository
cd /opt
sudo git clone https://github.com/mailcow/mailcow-dockerized.git
cd mailcow-dockerized

# Generate configuration
sudo ./generate_config.sh
The script will ask you for:
- Mail server hostname: Enter
mail.yourdomain.com - Timezone: Enter your timezone (e.g.,
Europe/London) - Branch: Choose the stable
masterbranch
On a machine with less than about 2.5 GB of RAM it also offers to disable ClamAV.
Then pull and start:
sudo docker compose pull
sudo docker compose up -d
This downloads and starts mailcow’s containers (around 18 of them). It takes a few minutes on first run. Mailcow handles its own Let’s Encrypt certificate, so HTTPS should work automatically once the containers are up.
Check everything is running:
sudo docker compose psAll containers should show as “Up” or “Up (healthy)”.
Step 4: Log In and Add Your Domain
Open https://mail.yourdomain.com/admin in your browser. Current mailcow releases keep the administrator login at /admin; the plain hostname is the login page for mailbox users.
Default credentials:
- Username:
admin - Password:
moohoo
Change this password immediately after logging in. Go to System > Configuration > Access > Administrators and edit the admin account.
Add Your Domain
- Go to E-Mail > Configuration
- Under the Domains tab, click Add domain
- Enter your domain name (e.g.,
yourdomain.com) - Set quotas as needed (defaults are fine for personal use)
- Click Add domain and restart SOGo
Create a Mailbox
- Still in E-Mail > Configuration, click the Mailboxes tab
- Click Add mailbox
- Enter your desired address (e.g.,
eric), select the domain you just added, set a display name and a strong password - Click Add
You now have a working mailbox at [email protected].
Step 5: Set Up DKIM
DKIM adds a digital signature to your outgoing emails, proving they genuinely came from your server. Without it, your mail is much more likely to hit spam folders.
- Go to System > Configuration > Options > ARC/DKIM keys
- Select your domain from the dropdown
- Select key size 2048 (the default)
- Click Generate
- Copy the DKIM public key that appears
Now add it to your DNS:
| Type | Name | Value |
|---|---|---|
| TXT | dkim._domainkey.yourdomain.com |
The key you just copied (starts with v=DKIM1;k=rsa;...) |
Note: Some DNS providers have a character limit on TXT records. If the key is too long, you may need to split it into multiple quoted strings. Cloudflare handles this automatically.
Step 6: Test Your Setup
Send a Test Email
- Go to
https://mail.yourdomain.com/SOGo - Log in with the mailbox credentials you created
- Compose a new email to an external address (your Gmail, Outlook, etc.)
- Check if it arrives and whether it lands in inbox or spam
Check Your Score
Go to mail-tester.com, copy the test address it gives you, and send an email to it from your new server. It will score your setup out of 10.
Target: 9 or above. If you are lower:
- Check SPF, DKIM, and DMARC records are correct
- Verify reverse DNS is set
- Make sure your IP is not on any blocklists (the report will tell you)
If you are sending to Gmail addresses, it is also worth reading Google’s email sender guidelines. Since 2024 Google enforces SPF/DKIM alignment on bulk senders, and the same standards are what keep small senders out of spam too.
Verify Authentication Headers
When you receive a test email in Gmail, click the three dots and “Show original”. Look for:
spf=pass
dkim=pass
dmarc=pass
All three should say “pass”. If any fail, double-check the corresponding DNS record.
Step 7: Adding More Domains
Mailcow handles multiple domains out of the box. For each additional domain:
- Add DNS records (MX, SPF, DMARC) pointing to the same
mail.yourdomain.comserver - Add the domain in E-Mail > Configuration
- Generate DKIM keys for the new domain
- Add the DKIM TXT record to the new domain’s DNS
- Create mailboxes as needed
You do not need separate servers for each domain. One Mailcow instance can serve dozens of domains, which is where self-hosting starts beating the per-mailbox pricing of hosted providers.
Accessing Your Email
Webmail
SOGo webmail is available at https://mail.yourdomain.com/SOGo. It includes email, calendar, contacts, and tasks.
Desktop and Mobile Clients
Configure any standard email client with these settings:
Incoming (IMAP):
- Server:
mail.yourdomain.com - Port: 993
- Security: SSL/TLS
- Username: your full email address
Outgoing (SMTP):
- Server:
mail.yourdomain.com - Port: 587
- Security: STARTTLS
- Username: your full email address
Works with Thunderbird, Apple Mail, Outlook, K-9 Mail, and any standard email client.
VPS-Specific Considerations
Hetzner Cloud
- Request the port 25 and 465 unblock with a limit request once the account is a month old and the first invoice is paid
- Set reverse DNS in the Cloud Console under your server’s networking settings
- Open mail ports in the Hetzner Cloud Firewall (only if you use one) (this is separate from UFW on the server). Go to Firewalls in the console and add inbound rules for ports 25, 80, 443, 465, 587, 993, 995, and 4190.
Contabo
- Port 25 is open by default
- Reverse DNS is set in the VPS control panel
DigitalOcean
- SMTP ports 25, 465 and 587 are blocked on Droplets with no documented way to unblock them, so choose another provider for a mail server
Troubleshooting
“I can’t log in to the admin panel”
First check you are on the admin login page at /admin: the plain hostname is the mailbox user login, and admin credentials will not work there. If the password really is lost, mailcow ships a helper that resets the admin account to a random password and prints it:
cd /opt/mailcow-dockerized
./helper-scripts/mailcow-reset-admin.sh
Older installs had the same script in the mailcow root directory.
“Ports are open but clients can’t connect”
Two things to check:
- Cloud firewall: Your VPS provider likely has a firewall in their web console that is separate from UFW/firewalld on the server. Both need the same ports open.
- Test from outside: Do not test port connectivity from the server itself. Use an external tool or your home machine:
nc -zv mail.yourdomain.com 993
nc -zv mail.yourdomain.com 587
“Email lands in spam”
Most common causes:
- Missing reverse DNS: This is the number one reason. Verify with
dig -x YOUR.IP - SPF/DKIM/DMARC not all passing: Check with mail-tester.com
- New IP reputation: Fresh IPs have no reputation. Send genuine emails for a few weeks, do not bulk send immediately
- IP on a blocklist: Check at MxToolbox
“Config changes aren’t taking effect”
If you edit mailcow.conf, a simple docker compose restart does not reload the configuration. Environment variables are only read when containers are created:
cd /opt/mailcow-dockerized
sudo docker compose down
sudo docker compose up -d
This is a common gotcha: restart reuses the existing container with its old environment variables. down then up creates fresh containers with the current config.
Using the API as a Fallback
If the web UI gives you trouble, Mailcow has a full REST API. Enable it by editing mailcow.conf:
# Uncomment and set these lines:
API_KEY=your-secret-api-key-here
API_ALLOW_FROM=127.0.0.1,YOUR.IP.HERE
Important: You must set both API_KEY and API_ALLOW_FROM. Setting only the key gives a misleading “authentication failed” error. Then do a full down/up (not restart) to load the new variables.
Example API calls:
# List domains
curl -sk -H "X-API-Key: your-secret-api-key-here" \
  "https://mail.yourdomain.com/api/v1/get/domain/all"

# Add a domain
curl -sk -H "X-API-Key: your-secret-api-key-here" \
  -H "Content-Type: application/json" \
  -X POST "https://mail.yourdomain.com/api/v1/add/domain" \
  -d '{"domain":"newdomain.com","active":"1","aliases":"400","mailboxes":"10","defquota":"1024","maxquota":"4096","quota":"10240"}'

# Add a mailbox
curl -sk -H "X-API-Key: your-secret-api-key-here" \
  -H "Content-Type: application/json" \
  -X POST "https://mail.yourdomain.com/api/v1/add/mailbox" \
  -d '{"local_part":"eric","domain":"newdomain.com","name":"Eric","password":"StrongPass123!","password2":"StrongPass123!","quota":"1024","active":"1"}'
The API can do everything the UI can. Full documentation lives in the official Mailcow docs and at https://mail.yourdomain.com/api on your own instance.
Backups
Mailcow includes a backup script:
cd /opt/mailcow-dockerized
sudo MAILCOW_BACKUP_LOCATION=/backup/mailcow ./helper-scripts/backup_and_restore.sh backup all --delete-days 7
Without MAILCOW_BACKUP_LOCATION the script prompts for a backup directory. Use --delete-days 7 to automatically remove backups older than a week.
Automate it with cron:
# Daily backup at 3am
echo "0 3 * * * root cd /opt/mailcow-dockerized && MAILCOW_BACKUP_LOCATION=/backup/mailcow ./helper-scripts/backup_and_restore.sh backup all --delete-days 7" | sudo tee /etc/cron.d/mailcow-backup
The backup location is set with the MAILCOW_BACKUP_LOCATION variable; the script has no path flag, and without the variable it would sit waiting for input that cron can never give it.
Security Hardening
A mail server is a public-facing target from the moment its MX record goes live, so treat it with the same discipline as anything else you expose. Our 7-step zero-trust checklist covers the baseline for any public-facing service.
Enable Two-Factor Authentication
Once logged into the admin panel, go to System > Configuration > Access > Administrators, edit your account and set a two-factor authentication method (TOTP, or a WebAuthn key). Do this for every admin account.
Protect SSH
Your mail server will be probed on SSH within hours of going online. Use key-based authentication and Fail2ban as a minimum. Mailcow ships its own Fail2ban-style netfilter container for the mail protocols, but SSH is your job.
Keep Mailcow Updated
cd /opt/mailcow-dockerized
sudo ./update.sh
Run this periodically. Mailcow handles database migrations automatically.
Consider Cloudflare Tunnel
For the web-facing parts (admin panel, webmail), you can put them behind a Cloudflare Tunnel to hide your server’s IP. Keep the mail ports (25, 465, 587, 993) direct, because tunnels do not support mail protocols.
The Career Angle: Why Email Skills Still Pay
Here is the part most self-hosting guides skip. Running your own mail server is one of the highest-density learning projects you can put in a homelab, because email touches everything: DNS, TLS, container orchestration, firewalling at two layers, log analysis, and reputation systems.
The skills map directly to paid work:
- SPF, DKIM and DMARC are live commercial problems. Since Google and Yahoo tightened sender requirements in 2024, businesses everywhere have scrambled to fix authentication. If you can read a DMARC report and explain why a domain fails alignment, you can solve a problem that companies pay consultants real money to fix. It is a recurring ticket in every MSP queue.
- Messaging administration is a distinct, underserved specialism. Solid Exchange Online or hybrid mail experience is a recognised skill set in UK infrastructure roles, and messaging-heavy M365 roles value it highly. The protocol knowledge is identical whether the stack is Mailcow or Microsoft; only the admin panel changes.
- Deliverability knowledge transfers to DevOps. Every product team eventually hits “our password reset emails go to spam”. Knowing why (rDNS, shared IP reputation, missing DKIM on the transactional subdomain) is the kind of answer that stands out in an interview.
Interview talking point: “I run a multi-domain mail server with full SPF/DKIM/DMARC alignment, scoring 10/10 on mail-tester, and I monitor DMARC aggregate reports” says more about your DNS and operational skills than most certifications. It proves you have debugged the real thing at 2am, not just read about it.
Is It Worth It?
Self-hosted email is not for everyone. If you just want private email, ProtonMail or Fastmail with your own domain gives you 90% of the benefit for a fraction of the effort.
But if you want to truly own your email infrastructure, understand how email works under the hood, or run multi-domain mail for several projects without per-mailbox fees, Mailcow makes it genuinely achievable.
The setup is an afternoon. The maintenance is minimal: occasional updates and monitoring. And you will never worry about a provider scanning your messages, changing their pricing, or suspending your account.
Your email. Your server. Your rules.
Next Steps
- Building out the rest of your stack? See Homelab Essential Services: Build Your Full Stack.
- Lock down the server itself with the SSH Configuration and Hardening Guide.
- Deploying more services with Docker? Start with Self-Hosted Deployment: Run Docker Apps on Your Own Server.
Frequently Asked Questions
Is it worth self-hosting your own email server?
For private email alone, a hosted provider like ProtonMail or Fastmail with your own domain is easier. Self-hosting with Mailcow makes sense if you want to own your mail infrastructure outright, run many domains without per-mailbox fees, or learn how email actually works. Setup takes an afternoon and maintenance is minimal.
What do you need to self-host email with Mailcow?
A VPS with 2 vCPU and 6GB RAM (roughly 5-12 pounds a month), a domain you control, and a provider that allows traffic on port 25. You also need to set an A record, MX record, SPF, DKIM, DMARC, and critically a reverse DNS (PTR) record pointing your IP back at your mail hostname.
Why does self-hosted email end up in spam?
The most common cause is missing reverse DNS, followed by SPF, DKIM or DMARC records that do not all pass, a brand-new IP address with no sending reputation, or an IP that is on a blocklist. Testing with mail-tester.com and aiming for a score of 9 or higher catches nearly all of these.
Can I run a mail server on my home internet connection?
Usually not for receiving mail directly, because almost all residential ISPs block port 25 and will not provide reverse DNS. You can still run Mailcow at home for learning or internal mail, or use a small VPS as a relay for inbound mail while the mailboxes live on your home server.
How much does it cost to run your own email server?
Mailcow itself is free and open source. The main cost is a VPS at roughly 5-12 pounds a month, plus your domain registration. One server can host dozens of domains and unlimited mailboxes, so the cost stays flat as you add projects, unlike per-mailbox pricing from hosted providers.
RTFM Apparel · printed in the UK


ReadTheManual is run, written and curated by Eric Lonsdale.
Eric has over 20 years of professional experience in IT infrastructure, cloud architecture, and cybersecurity, but started with PCs long before that.
He built his first machine from parts bought off tables at the local college campus, hoping they worked. He learned on BBC Micros and Atari units in the early 90s, and has built almost every PC he’s used between 1995 and now.
From helpdesk to infrastructure architect, Eric has worked across enterprise datacentres, Azure environments, and security operations. He’s managed teams, trained engineers, and spent two decades solving the problems this site teaches you to solve.
ReadTheManual exists because Eric believes the best way to learn IT is to build things, break things, and actually read the manual. Every guide on this site runs on infrastructure he owns and maintains.
Enjoyed this guide?
New articles on Linux, homelab, cloud, and automation every 2 days. No spam, unsubscribe anytime.