Want to build a homelab or run a serious Raspberry Pi project? Then ditch the SD cards and get ready to install Ubuntu Server onto a USB drive using Raspberry Pi Imager. Whether you’re building a multi-node Pi cluster (like we are), running self-hosted apps, or connecting to Azure — this is step one.
This guide works for Raspberry Pi 4 and 5, using either USB sticks or SD cards (just make sure you’ve got the right adapters). Let’s get into it.
How Do You Install Ubuntu Server on a Raspberry Pi? (Short Answer)
Flash Ubuntu Server 24.04 LTS to USB or SSD with Raspberry Pi Imager, preconfigure the hostname, user and SSH key in the Imager’s settings before writing, then boot and connect over SSH – no monitor needed. USB/SSD boot is strongly preferred over microSD for reliability. The full walkthrough below covers first-login hardening too.
🧰 What You’ll Need
- Raspberry Pi 4 or 5
- A 32GB (or larger) USB stick (or SD card with reader)
- Raspberry Pi Imager (free from raspberrypi.com)
- A laptop or desktop to run the Imager
- Your Wi-Fi SSID & password (if using wireless)
- A hostname and password you want to use
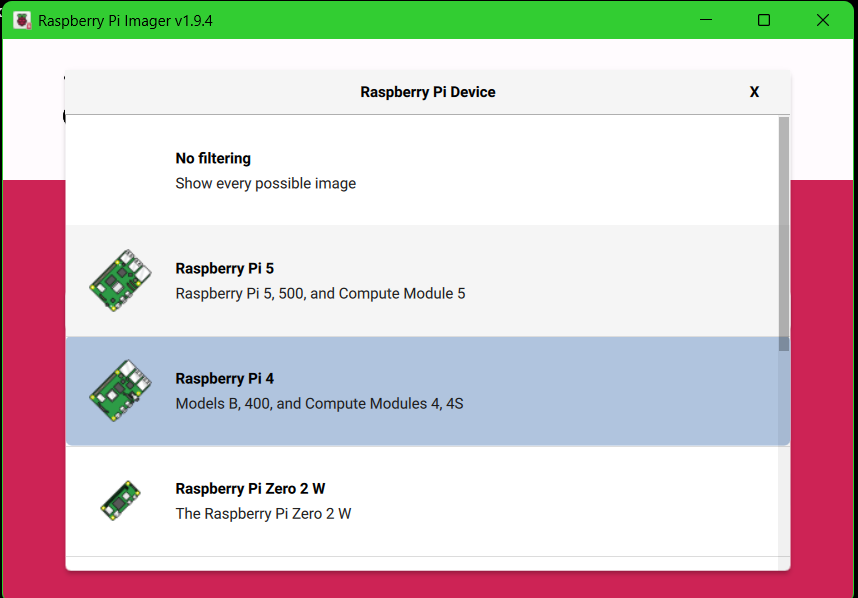
📥 Step 1: Open Raspberry Pi Imager
After downloading and opening Raspberry Pi Imager:
- Click “Choose Device” and select your model (we’re using Raspberry Pi 4).
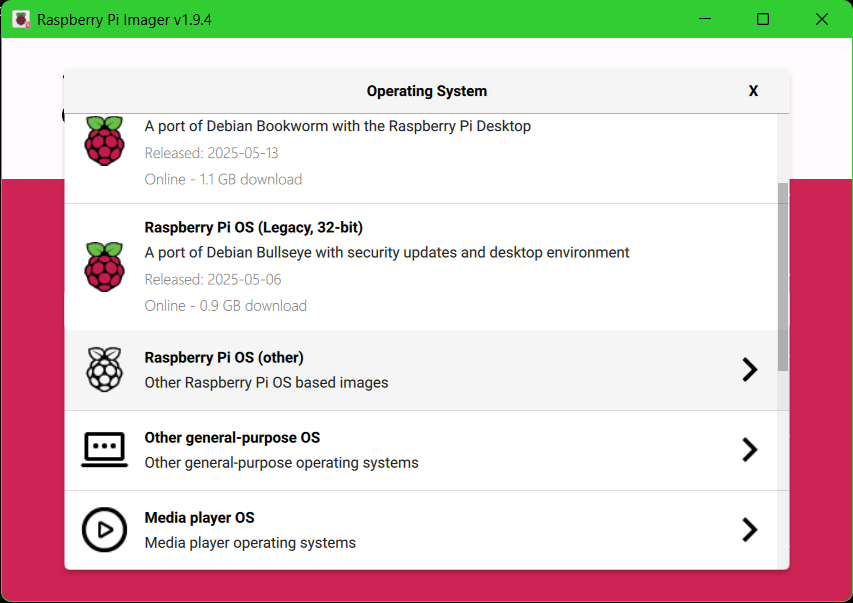
- Click “Choose OS”
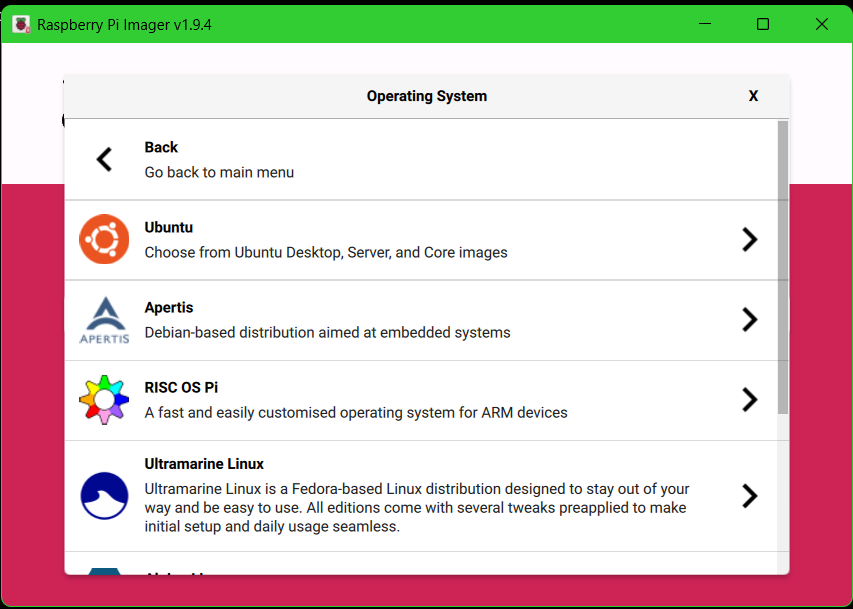
- Scroll to “Other general purpose OS”
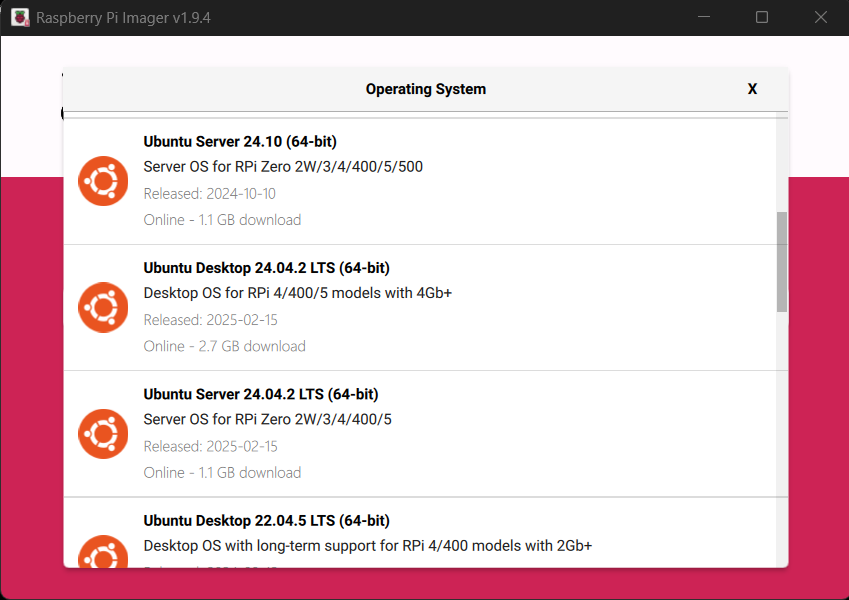
- Choose “Ubuntu”, then find Ubuntu Server 24.04 LTS (64-bit)
- Why this version? It’s the latest Azure-supported release, perfect if you’re planning to use Azure Arc or other Microsoft integrations.
- If you’re not using Azure, feel free to choose the most recent version listed.
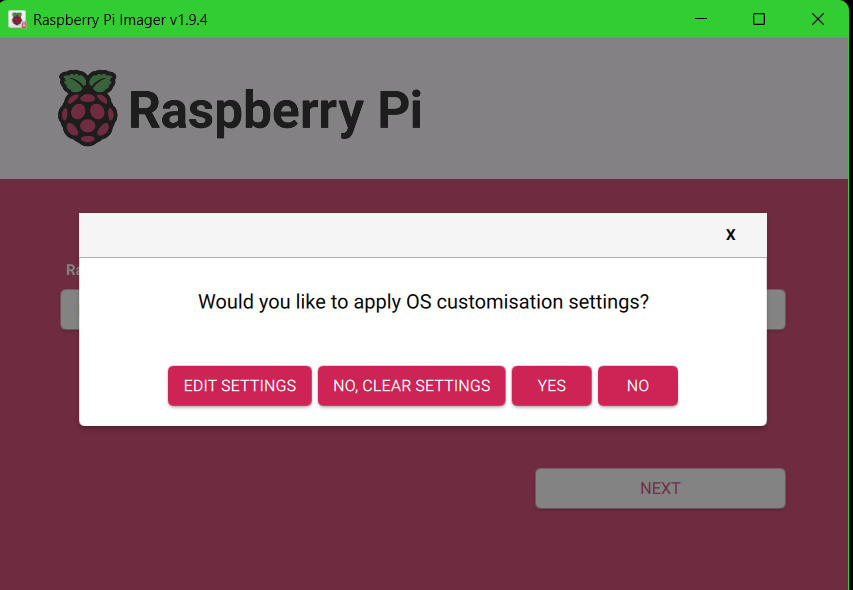
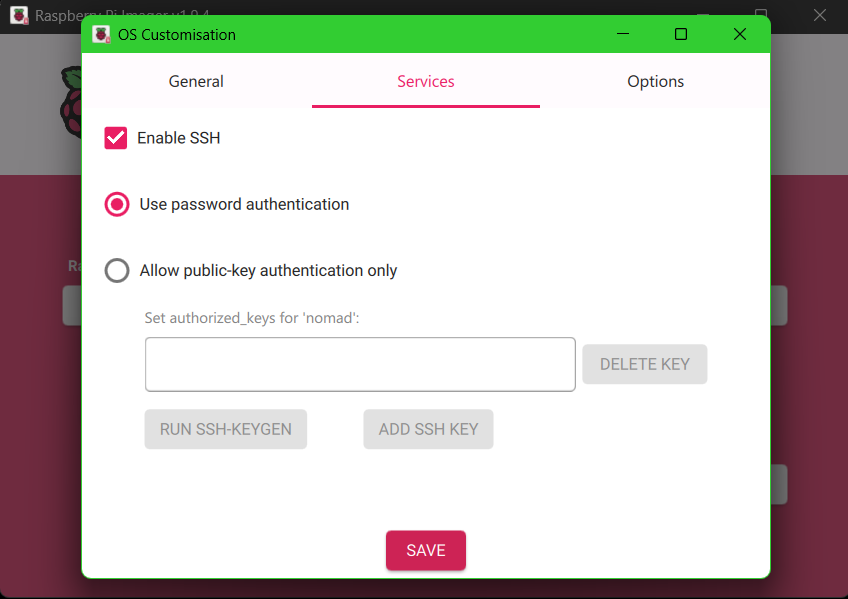
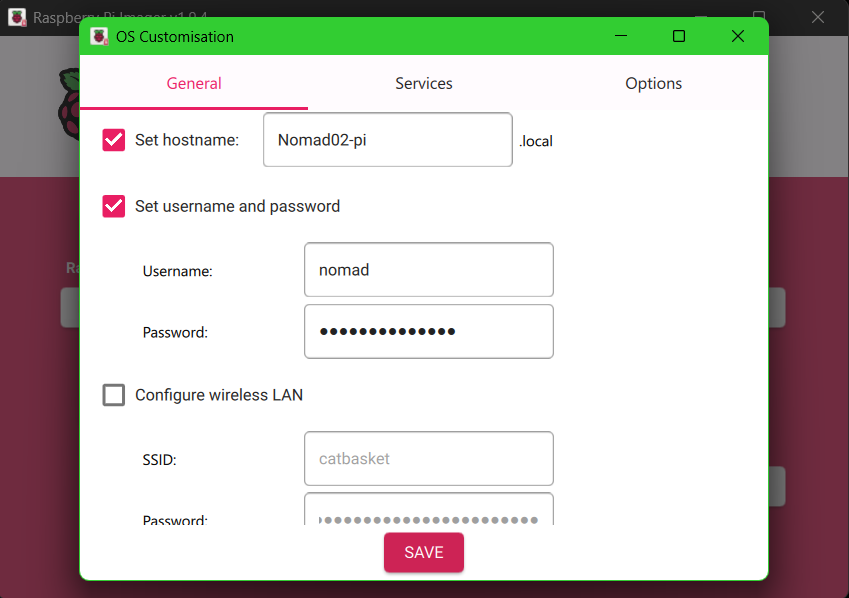
⚙️ Step 2: Set Up Advanced Configuration
When you hit image, you;’ll be asked about advanced options before imaging.
Here’s what to configure:
Note: It’s no longer pi by default — this improves security.
Set a hostname (e.g. pi-node-1)
Enable SSH for remote access
Set Wi-Fi SSID and password (optional if using Ethernet)
Set a custom username and password
💾 Step 3: Image Your USB (or SD Card)
- Click “Choose Storage” and select your USB stick
- Hit “Write”
- Accept any prompts about data being erased
- Sit back for a couple of minutes (1–5 mins depending on your PC speed)
🎉 That’s it — once it’s done, eject the drive and plug it into your Raspberry Pi.

✅ Final Step: Boot Your Pi
Plug in your imaged USB (or SD card) and power on your Pi.
- If your config had SSH enabled, you’re ready to log in remotely.
- If you used Wi-Fi, give it a minute to connect before trying SSH.
- You’ll now have a clean, lightweight Ubuntu Server install — ready to build, host, automate, or join your cluster!

📦 Bonus: Why USB Over SD?
USB drives are generally faster, more durable, and better for long-term use — especially in clusters or server-like environments. They also make it easier to move configurations around or reuse devices for other projects.

🔗 Links & Resources
Ready for the next step? Subscribe or follow along — we’re building real tech skills one Pi at a time.
Your lab. Your rules.
#ReadTheManual #RaspberryPi #UbuntuServer #HomeLab #PiCluster #SelfHosted #Linux #Automation #TechLearning #AzureArc
From the homelab: Why I Moved Everything to USB Boot
SD cards fail. It is not a question of if, it is when. I moved all my Pis to USB boot early on and have not looked back. The speed difference is immediately noticeable, reliability goes up dramatically, and SSDs are cheap enough now that there is no good reason to keep running your Pi off a microSD card.
Why USB Boot Over SD Cards?
MicroSD cards were designed for cameras and phones — devices that write data occasionally and read it a lot. A server OS is the opposite: constant writes for logs, databases, temp files, swap, and container layers. SD cards have a limited number of write cycles, and a busy Pi will burn through those cycles faster than most people expect.
Here is what you actually gain by switching to USB boot:
- Reliability. SSDs are built for sustained read/write workloads. I have had SD cards corrupt within months of running a busy Pi. The USB SSDs on my Pis have been running for over a year without a single issue.
- Speed. The difference is not subtle. Sequential read speeds on a decent USB SSD are 300-400 MB/s compared to 40-90 MB/s on a fast SD card. Boot times drop noticeably. Docker image pulls are faster. Anything that touches disk — which is everything — benefits.
- Longevity. Even a budget 120GB SATA SSD has a write endurance measured in hundreds of terabytes. A microSD card typically has endurance measured in tens of terabytes, and cheaper cards are worse. For a device running 24/7 as a server, this matters.
- Cost. A 120GB SATA SSD costs around 12-15 quid. A USB-to-SATA adapter is another 8-12 quid. For roughly 20-25 quid total, you get a storage solution that is faster, more reliable, and will outlast the Pi itself.
What You Need for USB Boot
The hardware list is short and cheap:
- Raspberry Pi 5 (or Pi 4 — both support USB boot natively). The Pi 5 supports USB boot out of the box. The Pi 4 may need a one-time firmware update via SD card to enable USB boot — more on that in the gotchas section below.
- A USB SSD. Two main options:
- SATA SSD + USB-to-SATA adapter: ~20-25 quid total. A 120GB Kingston A400 or similar budget SSD plus a Sabrent or StarTech USB 3.0 to SATA adapter. This is the cheapest reliable option.
- NVMe SSD + NVMe HAT (Pi 5 only): ~30-50 quid. Faster than SATA, but requires a Pi 5 compatible NVMe HAT/base board. The official Raspberry Pi M.2 HAT works well.
- A computer to flash the image. Any laptop or desktop running Raspberry Pi Imager.
You do not need a large SSD. Unless you are storing media files directly on the Pi, 120GB is more than enough for the OS, Docker, and a dozen containers. If you need more storage later, you can always mount a network share or add a second drive.
What Each Step Actually Does
The imaging process above uses Raspberry Pi Imager to write Ubuntu Server to your USB drive. Here is what is happening under the surface, so you understand the process rather than just following commands blindly:
- Choosing the device model tells the Imager which bootloader configuration to write. Pi 4 and Pi 5 have different boot processes, and the Imager adjusts accordingly.
- Choosing the OS downloads the selected Ubuntu Server image (or uses a cached copy) and prepares it for the target architecture (ARM64 for all modern Pis).
- Advanced configuration (hostname, SSH, Wi-Fi, username) writes a
cloud-initconfiguration to the boot partition. On first boot, Ubuntu reads this config and applies it automatically — setting your hostname, creating your user, enabling SSH, and connecting to Wi-Fi. This is why you can SSH in immediately without ever connecting a monitor. - Writing the image partitions the USB drive, writes the boot partition and root filesystem, and applies the cloud-init config. The verification step reads back what was written to confirm there were no errors.
When you plug the USB drive into your Pi and power it on, the Pi’s bootloader detects the USB device, loads the kernel from the boot partition, and hands off to Ubuntu’s init system. Cloud-init runs on first boot, applies your configuration, and within a couple of minutes you have a fully configured Ubuntu Server ready for SSH.
Gotchas and Troubleshooting
USB boot is reliable once it is working, but there are a few things that catch people out:
- Not all USB adapters work. Some cheap USB-to-SATA adapters have issues with UAS (USB Attached SCSI), which is the protocol the Pi uses for USB storage. If your Pi will not boot from a USB drive, the adapter is the most likely culprit. The Sabrent EC-SSHD and StarTech USB3S2SAT3CB are both known to work reliably. If in doubt, check the community compatibility lists.
- Pi 4 firmware update. The Pi 5 supports USB boot out of the box. The Pi 4 shipped with firmware that booted from SD card only. If your Pi 4 will not boot from USB, you need to update the bootloader firmware. Flash Raspberry Pi OS to an SD card, boot from it, run
sudo rpi-eeprom-update -a, then reboot. After the firmware update, the Pi 4 will boot from USB natively. - Power supply. An SSD draws more power than an SD card. If you are using a marginal power supply, adding an SSD can push it over the edge. The Pi 5 wants a 5V 5A (27W) USB-C supply. The Pi 4 wants 5V 3A (15W). Using the official Raspberry Pi power supplies avoids this issue entirely.
- First boot takes longer. Cloud-init runs on the first boot and applies all your configuration. This can take 1-3 minutes. Do not panic if the Pi seems unresponsive after first power-on. Wait a few minutes, then try to SSH in.
- Wi-Fi takes a moment. If you configured Wi-Fi in the Imager settings, the Pi needs to connect to your network before you can SSH in. This adds another 30-60 seconds after boot. If you can use Ethernet for the initial setup, it is faster and more reliable — you can always configure Wi-Fi later.

ReadTheManual is run, written and curated by Eric Lonsdale.
Eric has over 20 years of professional experience in IT infrastructure, cloud architecture, and cybersecurity, but started with PCs long before that.
He built his first machine from parts bought off tables at the local college campus, hoping they worked. He learned on BBC Micros and Atari units in the early 90s, and has built almost every PC he’s used between 1995 and now.
From helpdesk to infrastructure architect, Eric has worked across enterprise datacentres, Azure environments, and security operations. He’s managed teams, trained engineers, and spent two decades solving the problems this site teaches you to solve.
ReadTheManual exists because Eric believes the best way to learn IT is to build things, break things, and actually read the manual. Every guide on this site runs on infrastructure he owns and maintains.
Enjoyed this guide?
New articles on Linux, homelab, cloud, and automation every 2 days. No spam, unsubscribe anytime.