
Ansible configures servers. Terraform creates them.
That’s the simplest distinction. Terraform is infrastructure as code for provisioning – it creates the VMs, networks, storage accounts, and cloud resources that Ansible then configures. While Ansible can provision cloud resources, Terraform is purpose-built for it.
If you’re working with any cloud platform (AWS, Azure, GCP) or modern on-premises infrastructure (vSphere, Proxmox), Terraform is the tool hiring managers expect you to know.
Career Impact
Terraform is the lingua franca of cloud infrastructure.
Every serious cloud team uses Infrastructure as Code, and Terraform dominates the market. It appears in 80%+ of Cloud Engineer and DevOps job postings. Master it and you’re qualified for Cloud Engineer, Platform Engineer, and Solutions Architect roles paying £60k-95k+.
What You’ll Learn
- What Terraform is and when to use it
- HCL basics (HashiCorp Configuration Language)
- Providers, resources, and state
- Writing your first Terraform configuration
- Essential commands and workflows
Quick Reference
| Concept | What It Is | Example |
|---|---|---|
| Provider | Plugin for a platform | azurerm, aws, vsphere |
| Resource | Infrastructure object | VM, network, storage account |
| Data Source | Existing infrastructure | Look up existing subnet |
| State | Terraform’s record of what exists | terraform.tfstate |
| Plan | Preview of changes | terraform plan |
| Apply | Execute changes | terraform apply |
| Module | Reusable configuration package | modules/webserver |
Why Terraform?
The Problem It Solves
Without IaC:
- Click through cloud portals
- No record of what you created
- Can’t recreate environments
- Manual, error-prone, slow
With Terraform:
- Define infrastructure in code
- Version control your infrastructure
- Review changes before applying
- Destroy and recreate identically
- Collaborate with team
Terraform vs Cloud-Native Tools
| Feature | Terraform | ARM/CloudFormation/Bicep |
|---|---|---|
| Multi-cloud | Yes | No (vendor-specific) |
| Language | HCL | JSON/YAML/DSL |
| State management | Required | Handled by cloud |
| Learning once | Works everywhere | Learn each platform |
| Drift detection | Built-in | Varies |
Terraform’s multi-cloud capability is its killer feature. Learn it once, use it on AWS, Azure, GCP, VMware, and more.
Installation
Download and Install
# Linux
wget https://releases.hashicorp.com/terraform/1.7.0/terraform_1.7.0_linux_amd64.zip
unzip terraform_1.7.0_linux_amd64.zip
sudo mv terraform /usr/local/bin/

# macOS (Homebrew)
brew install terraform

# Verify
terraform version
# Windows (Chocolatey)
choco install terraformHCL Basics
The Language
Terraform uses HCL (HashiCorp Configuration Language). It’s designed to be human-readable:
# This is a comment

resource "aws_instance" "web" {
  ami           = "ami-0c55b159cbfafe1f0"
  instance_type = "t2.micro"

  tags = {
    Name = "WebServer"
  }
}
Blocks
Everything in Terraform is a block:
block_type "label1" "label2" {
  argument1 = "value"
  argument2 = 123

  nested_block {
    nested_argument = "nested_value"
  }
}
Data Types
# Strings
name = "webserver"

# Numbers
count = 3

# Booleans
enabled = true

# Lists
subnets = ["subnet-1", "subnet-2"]

# Maps
tags = {
  environment = "production"
  owner       = "ops-team"
}
Your First Configuration
Project Structure
terraform-demo/
├── main.tf        # Main configuration
├── variables.tf   # Input variables
├── outputs.tf     # Output values
└── terraform.tfvars  # Variable values
Simple Azure Example
main.tf:
# Configure the Azure provider
terraform {
  required_providers {
    azurerm = {
      source  = "hashicorp/azurerm"
      version = "~> 3.0"
    }
  }
}

provider "azurerm" {
  features {}
}

# Create a resource group
resource "azurerm_resource_group" "main" {
  name     = var.resource_group_name
  location = var.location

  tags = {
    environment = var.environment
  }
}

# Create a virtual network
resource "azurerm_virtual_network" "main" {
  name                = "${var.prefix}-vnet"
  address_space       = ["10.0.0.0/16"]
  location            = azurerm_resource_group.main.location
  resource_group_name = azurerm_resource_group.main.name
}

# Create a subnet
resource "azurerm_subnet" "main" {
  name                 = "${var.prefix}-subnet"
  resource_group_name  = azurerm_resource_group.main.name
  virtual_network_name = azurerm_virtual_network.main.name
  address_prefixes     = ["10.0.1.0/24"]
}
variables.tf:
variable "resource_group_name" {
  description = "Name of the resource group"
  type        = string
  default     = "demo-rg"
}

variable "location" {
  description = "Azure region"
  type        = string
  default     = "UK South"
}

variable "prefix" {
  description = "Prefix for resource names"
  type        = string
  default     = "demo"
}

variable "environment" {
  description = "Environment tag"
  type        = string
  default     = "development"
}
outputs.tf:
output "resource_group_id" {
  description = "ID of the created resource group"
  value       = azurerm_resource_group.main.id
}

output "vnet_id" {
  description = "ID of the virtual network"
  value       = azurerm_virtual_network.main.id
}

output "subnet_id" {
  description = "ID of the subnet"
  value       = azurerm_subnet.main.id
}
Essential Commands
The Workflow
# 1. Initialize (download providers)
terraform init
# 2. Format code
terraform fmt
# 3. Validate syntax
terraform validate
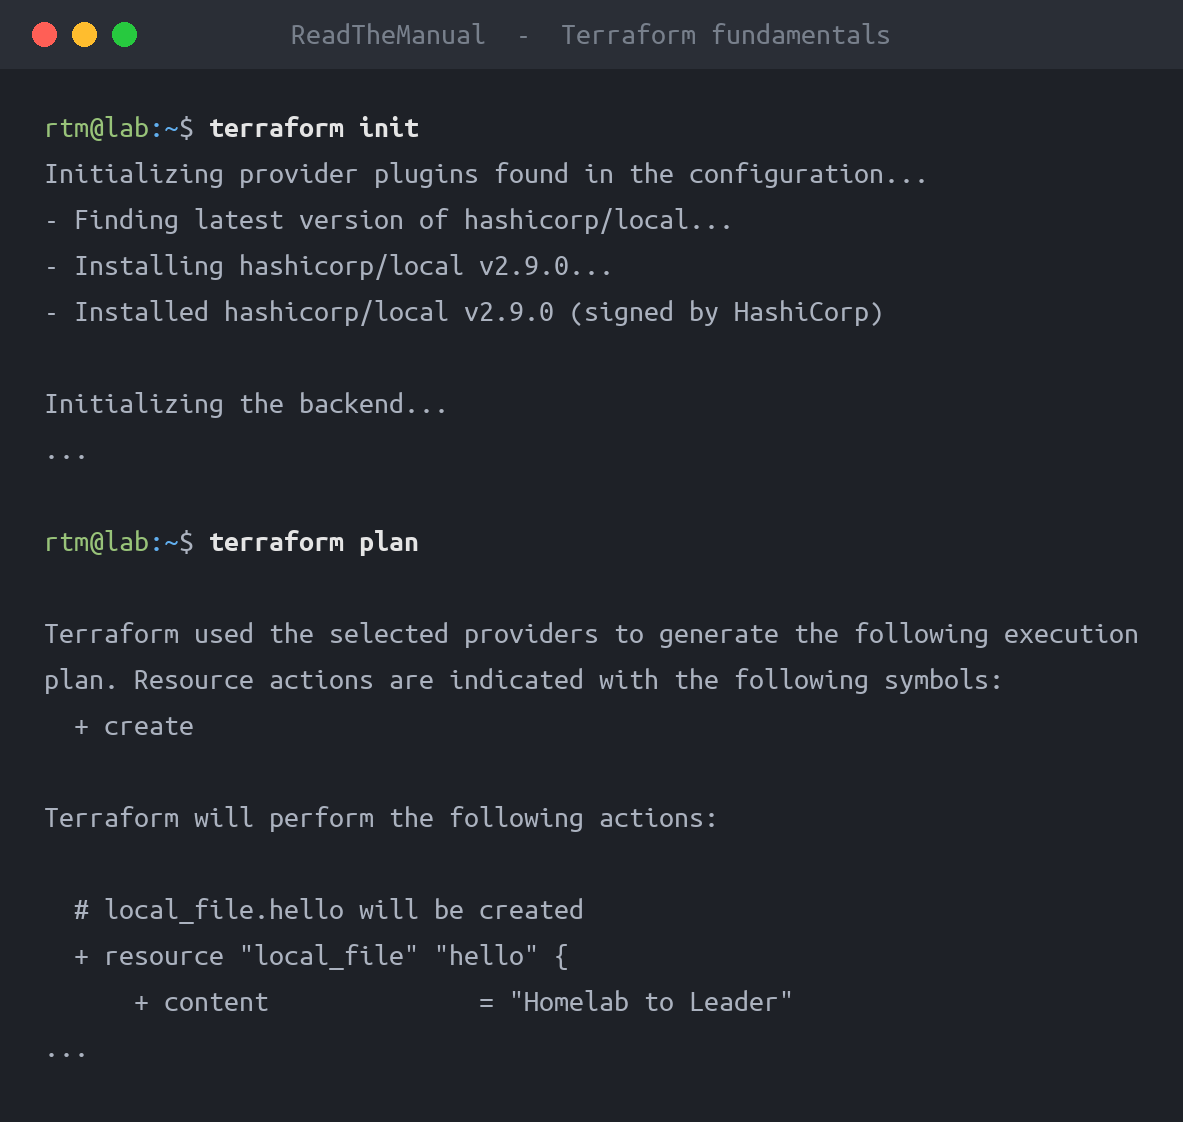
# 4. Plan (preview changes)
terraform plan
# 5. Apply (make changes)
terraform apply
# 6. Destroy (remove everything)
terraform destroyterraform init
Downloads providers and sets up the working directory:
$ terraform init

Initializing provider plugins...
- Finding hashicorp/azurerm versions matching "~> 3.0"...
- Installing hashicorp/azurerm v3.89.0...

Terraform has been successfully initialized!
terraform plan
Shows what Terraform will do without making changes:
$ terraform plan

Terraform will perform the following actions:

  # azurerm_resource_group.main will be created
  + resource "azurerm_resource_group" "main" {
      + id       = (known after apply)
      + location = "uksouth"
      + name     = "demo-rg"
      + tags     = {
          + "environment" = "development"
        }
    }

Plan: 3 to add, 0 to change, 0 to destroy.
terraform apply
Executes the plan:
$ terraform apply

Do you want to perform these actions?
  Terraform will perform the actions described above.
  Only 'yes' will be accepted to approve.

  Enter a value: yes

azurerm_resource_group.main: Creating...
azurerm_resource_group.main: Creation complete after 2s [id=/subscriptions/xxx/resourceGroups/demo-rg]
State Management
What is State?
Terraform tracks what it created in a state file (terraform.tfstate). This is critical:
- Maps configuration to real resources
- Tracks dependencies
- Enables change detection
- Contains sensitive data
Local vs Remote State
Local (default): State in local terraform.tfstate
- Fine for learning
- Dangerous for teams
- No locking
Remote (production): State in shared storage
- Team collaboration
- State locking
- Backup and history
Azure Backend Example:
terraform {
  backend "azurerm" {
    resource_group_name  = "terraform-state-rg"
    storage_account_name = "tfstateaccount"
    container_name       = "tfstate"
    key                  = "prod.terraform.tfstate"
  }
}
State Commands
# List resources in state
terraform state list

# Show specific resource
terraform state show azurerm_resource_group.main

# Remove resource from state (doesn't delete it)
terraform state rm azurerm_resource_group.main

# Import existing resource into state
terraform import azurerm_resource_group.main /subscriptions/xxx/resourceGroups/demo-rg
Variables and Outputs
Variable Types
# String
variable "name" {
  type    = string
  default = "myapp"
}

# Number
variable "instance_count" {
  type    = number
  default = 2
}

# Boolean
variable "enable_monitoring" {
  type    = bool
  default = true
}

# List
variable "availability_zones" {
  type    = list(string)
  default = ["1", "2", "3"]
}

# Map
variable "tags" {
  type = map(string)
  default = {
    environment = "dev"
    team        = "platform"
  }
}

# Object
variable "vm_config" {
  type = object({
    size    = string
    os_disk = number
  })
  default = {
    size    = "Standard_B2s"
    os_disk = 128
  }
}
Setting Variables
terraform.tfvars:
resource_group_name = "production-rg"
location           = "UK South"
environment        = "production"
Command line:
terraform apply -var="environment=staging"Environment variables:
export TF_VAR_environment="staging"
terraform apply
Using Outputs
Outputs expose values after apply:
output "vm_ip" {
  value = azurerm_public_ip.main.ip_address
}
Use in scripts:
VM_IP=$(terraform output -raw vm_ip)
ssh admin@$VM_IP
Data Sources
Look up existing resources:
# Find existing resource group
data "azurerm_resource_group" "existing" {
  name = "existing-rg"
}

# Use it in new resource
resource "azurerm_virtual_network" "main" {
  name                = "my-vnet"
  location            = data.azurerm_resource_group.existing.location
  resource_group_name = data.azurerm_resource_group.existing.name
  address_space       = ["10.0.0.0/16"]
}
Practical Examples
Example 1: Complete VM Deployment
# Variables
variable "prefix" {
  default = "demo"
}

variable "admin_password" {
  description = "Admin password for VM"
  type        = string
  sensitive   = true
}

# Resource Group
resource "azurerm_resource_group" "main" {
  name     = "${var.prefix}-rg"
  location = "UK South"
}

# Network
resource "azurerm_virtual_network" "main" {
  name                = "${var.prefix}-vnet"
  address_space       = ["10.0.0.0/16"]
  location            = azurerm_resource_group.main.location
  resource_group_name = azurerm_resource_group.main.name
}

resource "azurerm_subnet" "main" {
  name                 = "${var.prefix}-subnet"
  resource_group_name  = azurerm_resource_group.main.name
  virtual_network_name = azurerm_virtual_network.main.name
  address_prefixes     = ["10.0.1.0/24"]
}

# Public IP
resource "azurerm_public_ip" "main" {
  name                = "${var.prefix}-pip"
  location            = azurerm_resource_group.main.location
  resource_group_name = azurerm_resource_group.main.name
  allocation_method   = "Static"
}

# Network Interface
resource "azurerm_network_interface" "main" {
  name                = "${var.prefix}-nic"
  location            = azurerm_resource_group.main.location
  resource_group_name = azurerm_resource_group.main.name

  ip_configuration {
    name                          = "internal"
    subnet_id                     = azurerm_subnet.main.id
    private_ip_address_allocation = "Dynamic"
    public_ip_address_id          = azurerm_public_ip.main.id
  }
}

# Virtual Machine
resource "azurerm_linux_virtual_machine" "main" {
  name                = "${var.prefix}-vm"
  resource_group_name = azurerm_resource_group.main.name
  location            = azurerm_resource_group.main.location
  size                = "Standard_B2s"
  admin_username      = "adminuser"
  admin_password      = var.admin_password

  disable_password_authentication = false

  network_interface_ids = [
    azurerm_network_interface.main.id,
  ]

  os_disk {
    caching              = "ReadWrite"
    storage_account_type = "Standard_LRS"
  }

  source_image_reference {
    publisher = "Canonical"
    offer     = "0001-com-ubuntu-server-jammy"
    sku       = "22_04-lts"
    version   = "latest"
  }
}

# Outputs
output "public_ip" {
  value = azurerm_public_ip.main.ip_address
}
Example 2: Using Modules
modules/webserver/main.tf:
variable "name" {}
variable "resource_group_name" {}
variable "location" {}
variable "subnet_id" {}

resource "azurerm_network_interface" "main" {
  name                = "${var.name}-nic"
  location            = var.location
  resource_group_name = var.resource_group_name

  ip_configuration {
    name                          = "internal"
    subnet_id                     = var.subnet_id
    private_ip_address_allocation = "Dynamic"
  }
}

# ... rest of VM configuration
main.tf (using module):
module "webserver1" {
  source              = "./modules/webserver"
  name                = "web01"
  resource_group_name = azurerm_resource_group.main.name
  location            = azurerm_resource_group.main.location
  subnet_id           = azurerm_subnet.main.id
}

module "webserver2" {
  source              = "./modules/webserver"
  name                = "web02"
  resource_group_name = azurerm_resource_group.main.name
  location            = azurerm_resource_group.main.location
  subnet_id           = azurerm_subnet.main.id
}
Best Practices
Code Organization
- Use modules – Reusable, testable components
- Separate environments – Different state for prod/staging
- Consistent naming –
{project}-{environment}-{resource} - Version control – Everything except state and secrets
Security
- Never commit state – Add to
.gitignore - Use remote state – With encryption and locking
- Sensitive variables – Mark as
sensitive = true - Least privilege – Service principals with minimal permissions
Operations
- Always plan first – Review before apply
- Use workspaces – For environment separation
- Lock state – Prevent concurrent modifications
- Backup state – It’s your source of truth
.gitignore for Terraform
# Local .terraform directories
**/.terraform/*

# .tfstate files
*.tfstate
*.tfstate.*

# Crash log files
crash.log
crash.*.log

# Exclude all .tfvars files (may contain secrets)
*.tfvars
*.tfvars.json

# Override files
override.tf
override.tf.json
*_override.tf
*_override.tf.json
Interview Questions
Q1: “Explain the difference between Terraform and Ansible.”
Good Answer: “They solve different problems. Terraform is for provisioning – creating infrastructure like VMs, networks, and cloud services. It tracks state and manages the lifecycle of resources. Ansible is for configuration – installing software, deploying applications, managing settings on existing servers. In practice, you use both: Terraform creates the servers, Ansible configures them. Terraform is declarative and idempotent for infrastructure state, while Ansible is procedural but also idempotent for configuration tasks.”
Q2: “What is Terraform state and why is it important?”
Good Answer: “State is Terraform’s record of what it has created. It maps your configuration to real resources in the cloud. Without state, Terraform wouldn’t know what exists – it would try to create everything fresh every time. State is critical for detecting drift, planning changes, and managing dependencies. For teams, remote state with locking is essential to prevent conflicts. State contains sensitive data, so it must be secured – encrypted in storage, access controlled.”
Q3: “How would you manage Terraform for multiple environments?”
Good Answer: “Several approaches work. I prefer separate state files per environment using different backend configurations or workspaces. Variables differ per environment using .tfvars files like production.tfvars and staging.tfvars. The code is the same – only variables change. For true isolation, separate directories with their own state. CI/CD pipelines then target specific environments with the appropriate variable files. The key is keeping prod state completely separate from non-prod.”
Career Application
On Your Resume
- “Managed cloud infrastructure for 50+ Azure resources using Terraform”
- “Implemented infrastructure as code reducing provisioning time from days to minutes”
- “Designed Terraform modules for standardized VM deployments across environments”
Demonstrate
- Multi-cloud awareness
- State management understanding
- Module design capability
- Security considerations
Next Steps
- Practice: Deploy something in Azure with Terraform, then destroy it
- Explore: Terraform Registry for pre-built modules
- Integrate: Add Terraform to CI/CD pipelines
- Advance: Learn Terraform Cloud for team collaboration
Infrastructure as code means your infrastructure is reproducible, reviewable, and version controlled. Start with one resource, build to entire environments.
Part 4 of 4
You’ve finished the Automation for Sysadmins series!
This guide is part of the Automation Fundamentals series. See the full series for more guides like this.


ReadTheManual is run, written and curated by Eric Lonsdale.
Eric has over 20 years of professional experience in IT infrastructure, cloud architecture, and cybersecurity, but started with PCs long before that.
He built his first machine from parts bought off tables at the local college campus, hoping they worked. He learned on BBC Micros and Atari units in the early 90s, and has built almost every PC he’s used between 1995 and now.
From helpdesk to infrastructure architect, Eric has worked across enterprise datacentres, Azure environments, and security operations. He’s managed teams, trained engineers, and spent two decades solving the problems this site teaches you to solve.
ReadTheManual exists because Eric believes the best way to learn IT is to build things, break things, and actually read the manual. Every guide on this site runs on infrastructure he owns and maintains.
Enjoyed this guide?
New articles on Linux, homelab, cloud, and automation every 2 days. No spam, unsubscribe anytime.