Homelab =
Real Learning
If you’re in tech — or trying to break into it — there’s something that no course or textbook can give you:
👉 Grit earned through hands-on experience.
And that’s where homelabs shine.
They give you the space to try, fail, learn, and grow. Whether you’re running containers on a Pi, testing identity in Azure, or building a DIY firewall — it’s yours to explore.
Homelabs dont have to be beautiful, expensive, perfectly cabled (but sure they of course can be!) They’re as unique as the techs that build them, but most will follow common themes!
But Wait… What Is a Homelab?
A homelab is any tech setup that helps you learn by doing.
It could be:
- 🔌 A Raspberry Pi with Docker
- 🧰 A few VMs on your laptop
- 🖥️ A retired corporate firewall from eBay
- ☁️ A sandboxed Azure tenant
Whether it’s in a garage or just a spare folder on your PC, it counts if it helps you test, tinker, and build.
Why You Should Care
Because real-world understanding beats passive learning every time.
You might know the theory behind DNS or patch management, but until you’ve broken something and had to recover it at 2AM… you don’t really get it.
A homelab gives you:
- 🎯 Confidence in your skills
- 💡 A safe place to try stuff you can’t risk at work
- 🔧 Practical examples for your CV, interviews, or freelance gigs
- 💬 Talking points that prove you’re not just a “textbook techie”
Start Cheap. Or Free.
You don’t need enterprise gear or £1000 ($1000) servers.
Here’s how you can start right now:
- Azure Free Tier — VMs, storage, functions, identity
- Proxmox VE — Turn an old PC into a hypervisor
- Pi + Docker Guide — Host anything
- Cloudflare Tunnel — Make your services public
- Raspberry Pi – Pi 5 is fastest but if you’re on a budget, get what you can afford!
- Raspberry Pi Zero (Starter Kit) – Probably the smallest single board Computer around (but not very quick! so just consider what you want to run on it)
We’ll walk through all of these in detail. With tutorials, shopping lists, project guides, and downloadable scripts — so you’re never stuck.

More Than a Lab — A Life Changer
We built ReadTheManual to do more than teach tech.
We’re here to:
- Unlock opportunity for career changers and curious minds
- Give back by sharing real-world lessons
- Collaborate with people across skill levels and backgrounds
- Build together — and launch the next generation of engineers, architects, and mentors
- 10 Raspberry Pi 5 projects that advance your career
This is about community. Growth. And helping people go from lab to leader.

Want to Join Us?
🛠️ Build a project.
🧠 Learn a skill.
🤝 Meet others doing the same.
From the homelab: Why I Care About This
I have been running homelabs since before the term existed. What started as a spare PC under my desk running a Linux distro I found on a magazine cover disc is now a Proxmox cluster on mini PCs, a Raspberry Pi rack, and over 30 self-hosted services. I work in enterprise Azure infrastructure by day and build sovereign infrastructure at home by night. This page exists because “what is a homelab” deserves a proper answer — not a three-paragraph fluff piece.
What Counts as a Homelab?
There is no minimum specification. If you are running a service at home that you manage yourself, you have a homelab. That includes:
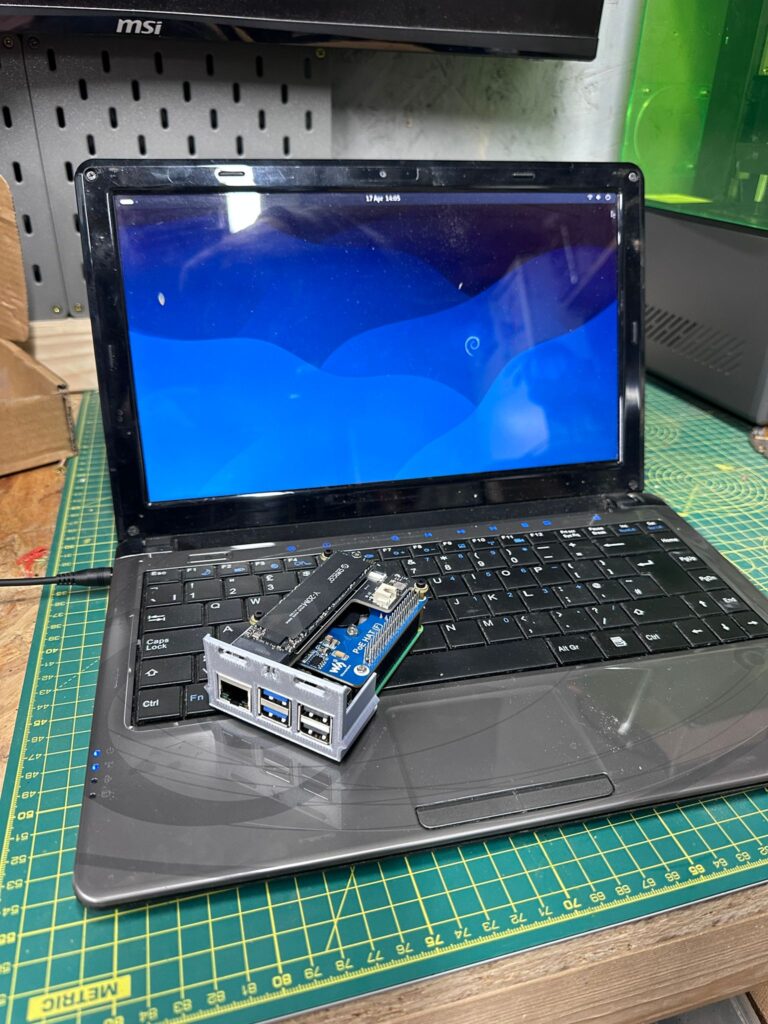
- A Raspberry Pi running Pi-hole to block ads on your network
- An old laptop with Docker installed, hosting a few containers
- A refurbished mini PC running Proxmox with half a dozen VMs
- A full 42U rack with enterprise switches, UPS, and dedicated storage
The person with a single Pi learning Linux for the first time and the person with a server rack running a Kubernetes cluster are both homelabbers. The hardware does not define it — the intent does. You are learning, experimenting, or running services for yourself and your household. That is a homelab.
Why Build One?
People build homelabs for different reasons. Most of us started for one reason and stayed for another.
Learning. A homelab is the safest place to break things. You cannot accidentally take down production when production is your own Nextcloud instance. Want to learn Ansible? Write a playbook and run it against your own hosts. Want to understand DNS? Run your own resolver. The feedback loop is immediate and the stakes are low.
Sovereignty. Every service you self-host is one fewer dependency on a company that can change its terms, raise its prices, or shut down entirely. Your files on Nextcloud instead of Google Drive. Your media on Jellyfin instead of Netflix. Your passwords in Vaultwarden instead of LastPass. You own the data, the backups, and the decision to keep running it.
Career. Hiring managers and interviewers notice when a candidate can talk about real infrastructure they have built and maintained. “I run a Proxmox cluster with automated deployments via Ansible” is worth more than any practice exam score. Homelabs give you stories to tell in interviews — and those stories demonstrate initiative, problem-solving, and genuine interest in the craft.
Fun. This is the honest reason for most of us. There is something deeply satisfying about standing up a new service, wiring it into your monitoring stack, and watching the Grafana dashboard light up green. If you have ever lost an evening to “just one more container,” you understand.
What Does a Typical Homelab Look Like?
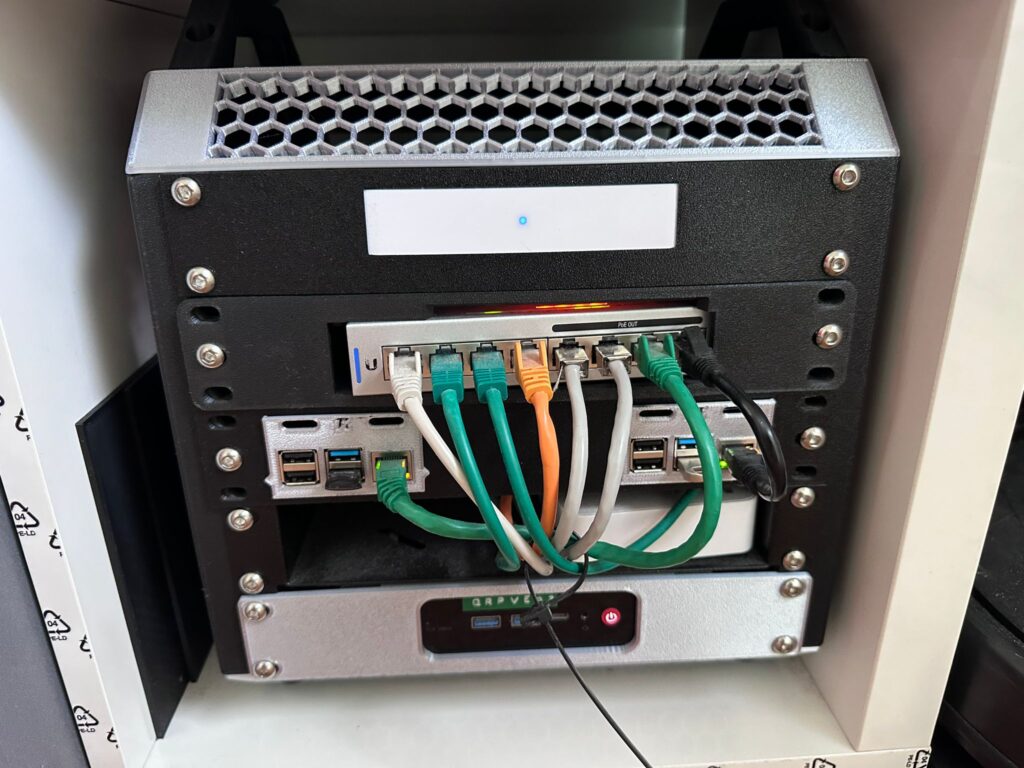
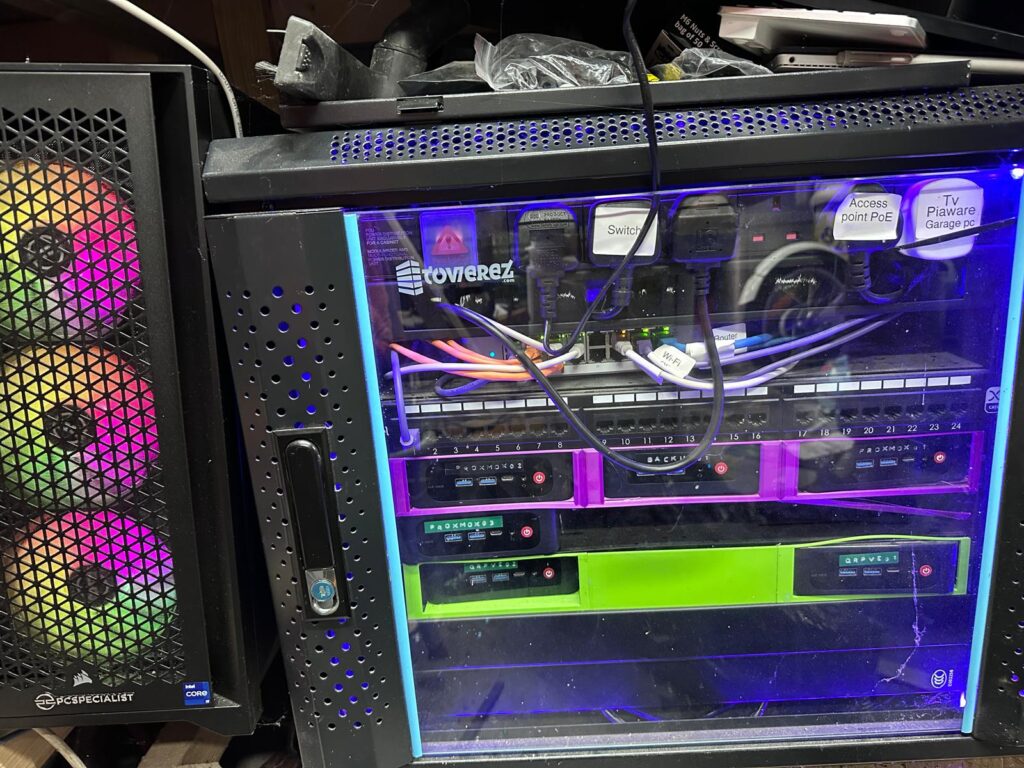
There is no typical homelab, but here is what mine looks like to give you a reference point:
- Compute: A Proxmox cluster running on Beelink SER5 mini PCs. They are silent, small, and typically draw single-digit watts at idle per published reviews.
- Pis: A rack of Raspberry Pis handling lightweight services — Pi-hole for DNS filtering, monitoring agents, and automation tasks. Low power, always on.
- Storage: Local SSDs in the mini PCs, with backups to an external drive and encrypted cloud sync for critical configs.
- Services: Nextcloud (files and calendar), Jellyfin (media), Gitea (version control), Grafana and Uptime Kuma (monitoring), n8n (automation), Nginx (reverse proxy), WireGuard and Twingate (remote access) — and about 20 more.
- Networking: A managed switch with VLANs separating homelab traffic from the household network. Cloudflare handles external DNS. Internal DNS runs on the domain controller.
That sounds like a lot, but it grew over years. It started with one Pi and a Docker install. Every homelab does.
How Much Does It Cost?
Less than most people think. Here is an honest breakdown of common starting points:
- Raspberry Pi 5 starter: ~60-80 quid. Pi board, case, power supply, and a USB SSD. Enough to run Docker, Pi-hole, and a handful of lightweight services.
- Refurbished mini PC: ~100-150 quid. A Lenovo ThinkCentre or HP EliteDesk from eBay with an i5, 16GB RAM, and an SSD. Enough to run Proxmox and host multiple VMs and containers.
- Proper cluster: ~300-500 quid. Two or three mini PCs with a managed switch. This is where high availability and real clustering start.
- Monthly electricity: Negligible for most setups. A Pi draws 5-15W. A mini PC draws 10-25W idle. Even running 24/7, you are looking at a few pounds per month on your electricity bill.
You do not need to spend 500 quid on day one. Buy one device, learn on it, and expand when you hit a genuine limitation — not before.
Common Mistakes When Starting Out
I have made most of these myself, so learn from my experience:
- Starting too big. Buying a full rack and enterprise switches before you have run a single container is backwards. Start with one device. Learn Docker. Deploy a few services. Then expand when you understand what you actually need.
- Buying enterprise gear for a home setup. That Dell PowerEdge R730 on eBay looks like a bargain at 200 quid. It is not. It draws 200-400W at idle, sounds like a jet engine, and your household will not tolerate it. Mini PCs exist for a reason.
- Not documenting what you build. Three months from now, you will not remember why you configured that VLAN or what that container does. Write it down. A simple markdown file in a Git repo is enough. Future you will be grateful.
- Trying to self-host everything at once. Pick two or three services that solve a real problem for you. Get them running reliably. Add more later. A homelab that does three things well is better than one that does twenty things poorly.
- Ignoring backups. If your only copy of your homelab config is on the homelab itself, you do not have a backup. Use Git for configs. Use an external drive or encrypted cloud sync for data. Test your restores.

ReadTheManual is run, written and curated by Eric Lonsdale.
Eric has over 20 years of professional experience in IT infrastructure, cloud architecture, and cybersecurity, but started with PCs long before that.
He built his first machine from parts bought off tables at the local college campus, hoping they worked. He learned on BBC Micros and Atari units in the early 90s, and has built almost every PC he’s used between 1995 and now.
From helpdesk to infrastructure architect, Eric has worked across enterprise datacentres, Azure environments, and security operations. He’s managed teams, trained engineers, and spent two decades solving the problems this site teaches you to solve.
ReadTheManual exists because Eric believes the best way to learn IT is to build things, break things, and actually read the manual. Every guide on this site runs on infrastructure he owns and maintains.
Enjoyed this guide?
New articles on Linux, homelab, cloud, and automation every 2 days. No spam, unsubscribe anytime.